Fruit trays are a great way to welcome guests to a party or event and can add a festive, visual "pop" when done correctly. Demonstrated in this video is an easy and efficient method for laying our a fruit platter or mirror. I chose to make the above video part of the "Kitchen Prep Series" because as a prep cook, your value will be greatly increased if you can properly prep and compose a fruit tray.

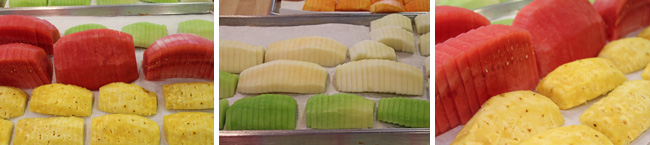
The first step in laying out any fruit platter is to properly slice all the fruit to the same thickness. In the pictures below I have pineapple, watermelon and other "seeded" melons such as casaba, cantaloupe and honey dew. For more information on how to properly slice the melon for a fruit display, please see the links at the bottom of this post.
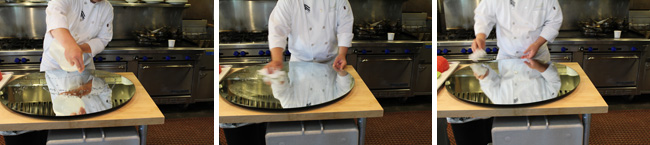
If using a mirror for the base of your fruit display you first want to clean it with distilled white vinegar. Sprinkle the vinegar all over the mirror and wipe dry with clean paper towels. Distilled white vinegar is used because unlike other vinegars it doesn't contain residual sugar (which will cause streaking) and is much preferred to a harsh house-hold glass cleaner for obvious taste and safety concerns.
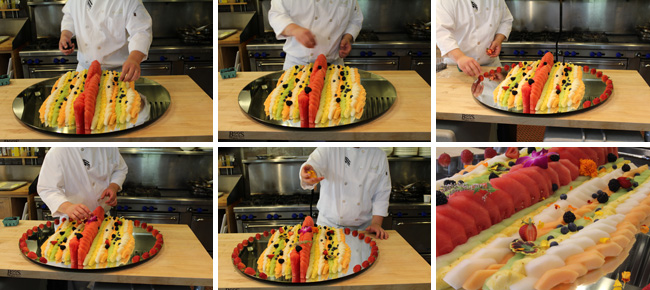
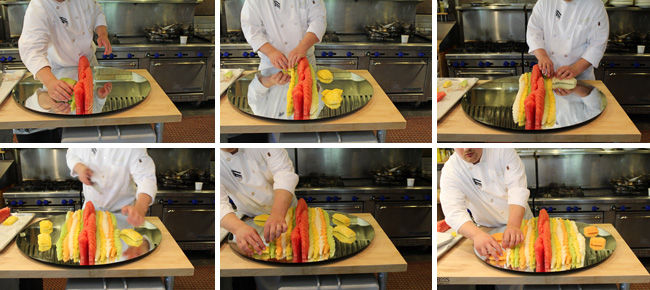
Using the blade of your chef's knife to pick up your pre-sliced fruit, place a row of watermelon down the center of your platter, fanning it out slightly. The watermelon will serve as the "center template" upon which the rest of your display will be built. Make sure the watermelon slices are fanned with equal spacing between each slice; this will be important for your next step.

Next, take another of melon or fruit and "shingle" it along side the watermelon so that end of each slice fits neatly into the gap left between the water melon slices. For a better visualization of this step, watch the video above. Continue outward with alternating colors of fruit, with each new line fitting snuggly like puzzles pieces into the last.
Once you have filled the tray to two-thirds capacity, garnish with fresh berries randomly place throughout the platter and some edible flowers which can be purchased at high end supermarkets or from you produce purveyor. Serve immediately, or place in your refrigerator for up to four hours before serving.