In this video I layout my technical approach to sauce making, a concept I refer to as the Three Modern Mother Sauces.
When I attended culinary school, the Five French Mother Sauces was at the core of our sauce making curriculum. The mother sauces and their multitude of derivatives are memorized and hammered into culinary school students, showing up on quizzes, tests, and finals.
The Five French Mother Sauces are still at the heart of most western culinary school's sauce curriculums today; and although I think it's important to understand the Five French Mother Sauces, in all honesty, they're really a redundant, out of date approach to teaching cooks the creative sauce making process.
The purpose of Stella Culinary isn't to turn you into a recipe machine; our true purpose is to teach the fundamental building blocks you need to understand the how's and why's of cooking, eventually unleashing your own culinary creativity and allowing you to express yourself through cooking.
When it comes to creating a sauce, there are only three base techniques you need to master to create any sauce you could ever dream up. Once these techniques and their corresponding best practices are understood, all that's necessary is to construct your preferred flavor structure over the top. This approach allows you to create a multitude of custom, unique sauces that can elevate your dish to the next level.
Pre-Requisites For The Above Video
To truly understand all the information in the video at the top of this page, it is highly recommended that you work your way through the following content first, if you haven't done so already:
- An Introduction to Flavor Structure - Video
- The Secrets of Salt Explained - Video
- Understanding the Five French Mother Sauces - Video
Also, if you haven't already, please download the first section of the F-STEP Curriculum, F is for Flavor, by signing up for our free e-mail news letter.
Once you've watched the above videos and read through the F is for Flavor PDF, you'll have a strong foundation for understanding the concepts laid out in the Three Modern Mother Sauces video.
A Sauce Making Foundation | The Five French Mother Sauces
Besides the Introduction to the Five French Mother Sauces Video listed above, you can also solidify your sauce making foundation by working your way through our massive mother sauce content, if you haven't already.
Even though I believe the Five French Mother Sauces are a redundant, out of date approach to teaching sauces, they should still be understood, if for anything else, historical context and breadth of knowledge. My only argument is that they shouldn't be at the core of a sauce making curriculum, but instead offered as supplemental information.
For links to podcasts, videos, and recipes relating to the Five French Mother Sauces, please review the related content section at the bottom of this page.
An Introduction to the Three Modern Mother Sauces
As discussed in the Three Modern Mother Sauces video, every sauce you make will fall into three technical categories; reduction, emulsification, and puree. Each of these techniques is rooted in best practices and a scientific approach, which once mastered, will allow you create any sauce imaginable.
Modern Mother Sauce Number One | Reduction
Reduction sauces are created by concentrating flavors and viscosity through reduction.
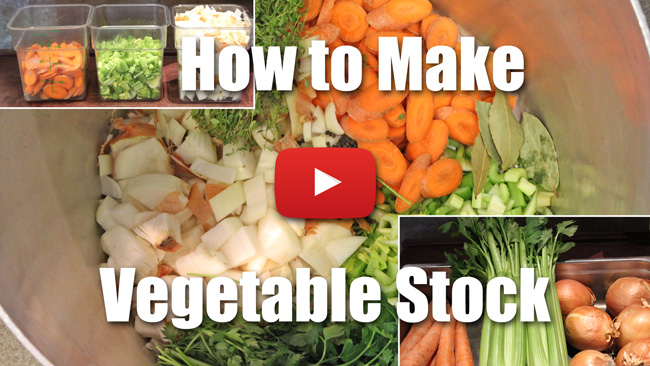
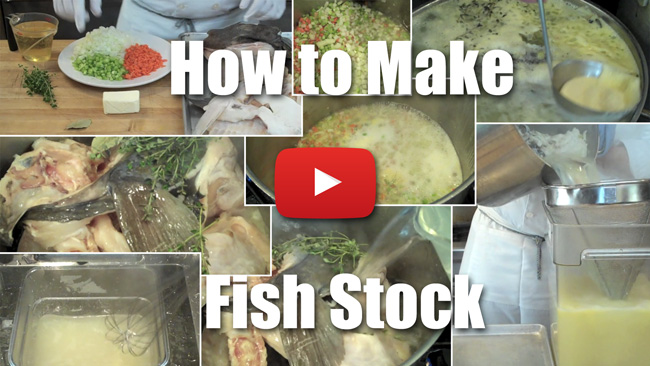
Since most reduction sauces are stock based, it's important to have a firm understanding of the stock making process. If you're new to making stocks, I highly recommend watching the videos below, listening to the two linked podcast episodes, and reviewing our guide to making stocks.
The Reduction Sauce Technique
Reductions are the king of all professional sauces. If you only learn how to make one sauce, this is it. To understand what a reduction sauce is, we must first discuss its historical context.
Modern Reduction Sauces are derived from classic brown sauce, (roasted stock thickened with brown roux), and to a lesser extent veloute, (white stock thickened with blond roux). The problem with flour-thickened sauces is they become heavy and easily create palate fatigue.
The modern approach to this style of sauce is to omit the starch thickener, instead, thickening via reduction. The resulting “reduction thickened sauce” will have a more intense flavor, and at the same time, a lighter mouth feel.
Since reduction sauces are thickened through evaporation, there must be some particulate matter present in the sauce to allow its viscosity to increase as the water evaporates. The flavors in a reduction sauce must be able to stand up to simmering temperatures over a prolonged period of time, because in some cases, it takes hours of reducing before a sauce reaches the proper consistency.
Because reductions must contain some form of particulate matter and hold up to prolonged exposure to high heat, they’re almost always made from protein based stocks. The collagen present in an animal's bones (and to a lesser extent flesh) is a triple-helix of gelatin that unravels into individual strands during the stock making process. The extracted gelatin combined with other dissolved solids in the stock creates the proper viscosity and richness required for a successful reduction sauce.
Due to the important role gelatin plays in most reduction sauces, it’s commonly considered best practice to use stock made from parts of the animal naturally high in collagen (mainly bones and muscles involved in the animals structure and mobility), including neck, legs, and joints.
Animal skin also contains a large amount of collagen, most notably pig skin, which is 30% collagen. However, you also need to take into consideration the amount of fat the skin will diffuse into your stock, and the flavor contributed. Too much skin will lead to a fatty stock that requires excessive skimming, and stocks that contain a large amount of pig skin tend to have a "barn yard" like flavor.
A converse example is making a reduction sauce using stock derived from proteins that contain very low collagen; i.e. chicken breast. If a chicken breast stock is reduced, the flavor would continue to become more concentrated, but the liquid would never reach sauce consistency without the addition of a thickening agent.
Remember that a sauce is merely a flavored liquid, meaning it doesn’t have to be viscous. With this understanding, a custom stock can be made depending on its intended application. Since a sauce containing lots of gelatin can sometimes have a sticky mouth feel, a low gelatin stock can be reduced to concentrate flavor and then thickened at the last minute by swirling in butter, cream, or liaison, yielding a more delicate consistency.
[More Information: Thickening Agents for Sauces and Soups Reviewed]
Although reduction sauces are commonly made from stocks, they can also be made from milk or cream. As the water in the cream evaporates during the reduction process, the increased ratio of fat will act as a thickening agent.
Broths are also categorized under reduction sauces because it’s considered best practice to reinforce through the addition of complimentary ingredients, (applying a reduction stage) which creates a concentrated flavor.
Starch Thickened Sauces
Now you may be wondering where starch-thickened sauces fit in. For ease of understanding, starch-thickened sauces are also classified under the “Reduction” category because even though it’s the actual starch granules adding viscosity to the sauce, it’s always best practice to apply reduction at the very least to concentrate flavors. In most cases, adding a starch thickener to a given sauce is a short cut used to increase yields while decreasing cooking time. They are rarely better than the same sauce thickened through full reduction sans starch.
Categorizing starch-thickened sauces under the reduction category will force you to ask yourself a few questions during the sauce making process:
- Why would I add starch to thicken this sauce? Time? Money?
- Will the addition of starch make this sauce better as compared to a full reduction?
- Should I reduce the sauce slightly to intensify the flavor, or is the flavor already where I want it?
This isn’t to say that all starch-thickened sauces are of low quality, but the above exercise is there to help you make the conscious decision of whether or not starch should be utilized to add viscosity to a given sauce.
Turkey gravy on Thanksgiving day just doesn’t taste the same unless its thickened with a brown roux. But when I order a pan roasted steak at a high end restaurant, I want a beef based reduction sauce, not grandma’s gravy.
The important take-away is starch thickeners should only be added to a sauce if it will increase its overall quality, not as a short cut. In some professional applications, it’s not economical to serve full reduction sauces, at which point a starch thickener is employed to increase yield. While this is sometimes a “necessary evil,” the chef should take into consideration the effect a starch thickener will have on the overall dish, and make the appropriate adjustments to produce the best flavor and texture possible within their means.
Reduction Sauce Process
The process for making a reduction sauce is fairly simple and can be broken down into three distinct stages; reinforcing, reducing, and finishing.
Reinforcing
During this stage, the base liquid (usually stock) is combined with complimentary ingredients that will reinforce its flavor and viscosity during reduction. For example, if making a reduction sauce with chicken stock as the base, chicken trimmings and bones, along with mirepoix, herbs, and spices, are added before and during the reduction phase.
This is also the step in which the sauce’s unique flavor should be defined. Because stock is a universal base ingredient, it commonly doesn’t use strong or distinct flavors, which could limit its versatility, especially in a professional environment where a single batch of stock may be used for multiple sauces, soups, and broths. In the reinforcing step, it’s time to add stronger flavors like roasted garlic, an abundance of herbs or any number of spices including cinnamon, cloves, vanilla ... really anything that will be complimentary to the primary ingredient the sauce will be accompanying.
Tips For Reinforcing Flavors
If reinforcing a roasted stock for reduction, add roasted ingredients including mirepoix, meat scraps, bones, etc.
If working in small batches and a roasted flavor is desired, brown ingredients in a heavy-bottomed pot with a mixture of butter and neutrally flavored oil. When a “fond” starts to form on the bottom of the pan, deglaze with wine or other liquid to release the fond into the sauce, adding additional flavor.
If working in large batches and a roasted flavor is desired, lightly coat ingredients in a neutral flavored cooking oil and roast in a high temp oven until dark brown. For extra flavor, deglaze the roasting pan with wine or water. This may require the application of moderate heat on the stove top while the liquid is added and the fond is scraped.
Be careful adding any ingredient that is particularly strong in flavor as it will intensify during the reduction process. This can be especially true for wines that are extremely acidic, tannic, or sweet. These wines should be abandoned for well balanced alternatives that don't favor any singular flavor profile (sweet, tannic, acidic, etc).
Don’t add acidic ingredients during the reinforcing stage, which will concentrate and cause your sauce to become overly sour after the reduction phase is complete. Instead, reserve acidic ingredients for the finishing stage to add balance and seasoning.
Reduction Stage
Once additional ingredients are added to the base, the sauce is brought to a simmer at which point the reduction phase begins. It is during this phase that water from the sauce will evaporate away, concentrating the flavor and increasing viscosity, especially if collagen-containing ingredients are used at any point in the sauce making process. It is also during this stage that starch thickeners can be added, if applicable to the style of sauce being made.
Tips For Reduction
Periodically skim the fat and “scum” that floats to the surface of the sauce during the reduction process.
Once the sauce comes to a boil, pull the pot half-way off the burner and reduce heat, ideally achieving medium simmer. This causes a convection cycle of heat during the reduction process, with the hot side of the pot bringing fat and scum to the surface, simplifying the skimming process.
As the sauce continues to reduce and its level drops, some of the sauce will stick to the side of the pot. Over a long period of reduction, the exposed sides will start to burn, giving a scorched flavor to your finished product. To avoid this, transfer the sauce to a clean pot throughout the reduction process anytime the sides threaten to darken and burn.
To achieve an extra intense flavor when working with large quantities of liquid, strain the reducing sauce every one to three hours into a new pot, adding fresh aromatics each time. This usually isn’t necessary to achieve a full-flavored reduction sauce, but the option is available.
If using a starch thickener, it’s best practice to add a little less than what is required to thicken the current volume of stock, then gently simmer and reduce until your desired level of viscosity is achieved. This will help ensure the sauce isn’t over thickened, at which point it can only be saved by dilution. Also, simmering a sauce for at least 20 minutes after a starch thickener is introduced will allow the “starchy” flavor to be cooked away. This is less important with pure starches derived from corn, potato, arrowroot, and tapioca, but is necessary when using a wheat based thickener like a roux.
For most reductions, the sauce will need to be evaporated by at least half, but more commonly, will yield about 1/4 to 1/8 the sauce’s original volume if omitting thickeners. Once the sauce has finished reducing, strain through a fine mesh strainer (chinois) and continue to the “finishing stage,” or chill rapidly in an ice bath, reserving for later use.
Finishing a Reduction Sauce
For best results, reduction style sauces should always be finished “a la minute,” or right before serving. During this stage, a firm understanding of flavor structure is vital, using a few ingredients right at the end to balance the sauce and bring it to the next level.
In this section we’ll talk about the various types of ingredients used to finish a reduction sauce, listed in the order in which they should be added.
Herbs and Spices
Although commonly incorporated during the reduction phase, a small amount of freshly minced herbs and/or toasted spices can be added while finishing, making their flavor a predominant focus. A common application is a thyme-wine demi glace, commonly served with beef. In this example, veal or beef stock is reinforced with a good amount of red wine and fresh thyme during the reduction phase. The reduced sauce is then finished with more red wine (sometimes reduced in a separate pan), and freshly minced thyme. The last minute addition of the thyme will bring its flavor to the forefront, elevating it from a secondary to primary flavor component.
Depending on the refinement level of a given dish, herbs and spices are sometimes allowed to infuse for a short period of time, and then strained through a fine mesh strainer right before serving. The straining ensures a smooth, silky texture, and is usually preferable in a more refined setting.
Fat
Fat is often added to a sauce right before serving in the form of dairy, whether it be cream, butter, sour cream, or even cheese, with whole butter being the most common and versatile choice.
In most cases, the sauce is removed from the heat before the fat is added to prevent it from separating, which will cause a “greasy” appearance and mouth feel. One exception is when cream is used to thicken sauce, in which case its added towards the end of the reduction stage and simmered until the desired viscosity is achieved.
- Fat is used as a finishing ingredient for a few reasons.
- Fat can add viscosity through suspending fat globules in the sauce (this is technically an emulsification).
- Fat can enhance the overall mouthfeel of a given sauce.
- Some aromatic flavor molecules are only fat soluble. The addition of fat to a sauce insures maximum flavor delivery.
As we discussed in our section on flavor, fat can coat the palate and mute taste perception, including salt. For this reason, its important to add fat to your sauce and then adjust the final seasoning with acid and salt.
Acid
Because it can mute salt and other seasonings, it’s important to add acid right after the fat is incorporated during the finishing stage. This ensures the proper amount of acid is added to effectively cut through fat, which in turn will brighten the sauce’s flavor, making it “pop.”
Common acids incorporated into sauces during the finishing stage include citrus juice and zest, (lemon being very classic), verjus, or a light vinegar (champagne, moscato, sherry, etc). It’s not necessary and usually undesirable to add enough acid to make the sauce perceptibly sour. Usually just a few drops of acid per cup of sauce is sufficient for seasoning and balance.
Final Seasoning
When making a reduction, it’s important to adjust the final seasoning right before serving to ensure complete control over the finished flavor profile. Since the reduction of a sauce will intensify its flavor, a sauce can easily become overly salted if the seasoning is added too early in the reduction process. Just think what would happen if a sauce was perfectly seasoned with salt half-way through the reduction stage. By the time the sauce is fully reduced, it will likely be inedible.
It’s important to leave the final seasoning until the very end because as we discussed above, both fat and acid will mask salt. If salt is added before fat or acid, it’s likely more seasoning will be needed, adding an unnecessary step.
Although salt is indispensable for seasoning a sauce, there are other ingredients that can be added during this phase, most notably pepper (either white or black) and cayenne. The addition of cayenne can cut the richness of a heavy reduction sauce, and if used in small amounts, should add no perceptible spiciness.
Due to the minerals extracted during the stock making process, which are then concentrated during the reinforcement and reduction steps, most full reduction sauces derived from a meat based stock will not need any additional salt. However, it's always best practice to taste for seasoning right before you serve, and a reduction sauce is no exception.
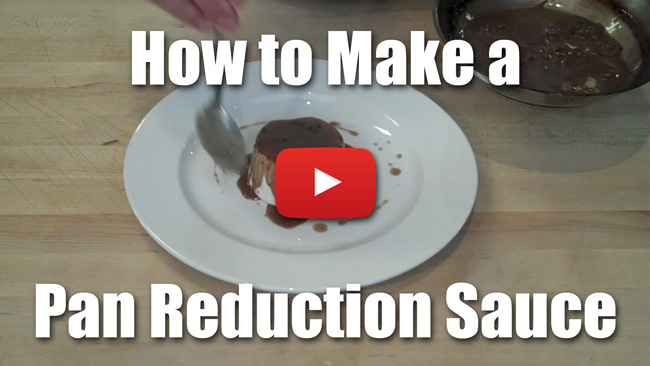
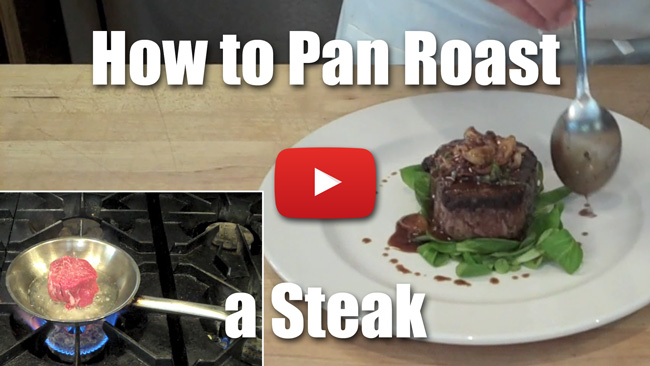
Pan Sauces
One of the best ways to utilize a reduction is by making a pan sauce. To make a pan sauce:
Complete the first two phases of the reduction sauce process (reinforcing and reducing). Reserve the reduced sauce base.
Sear, sauté, or pan roast food product in an appropriately sized pan. The product will dictate the sauce base, so a reinforced chicken stock will be used for chicken, a reinforced veal stock for beef, etc. There can be some crossover, such as a veal stock based sauce served with chicken, or a chicken based sauce served with beef or even fish, but the general approach is to use a stock derived from the same animal you’ll be serving it with.
Remove protein from pan when cooking is complete, and return the empty pan to high heat, adding additional cooking fat if the pan seems dry, or pouring off excess fat if there seems to be too much (you only need enough fat to evenly cover the bottom of the pan).
Sauté sliced shallots, onions, garlic, or other aromatics in the hot pan until their aroma is released. For some applications, browning the aromatics is desirable, whereas for a more subtle sauce, the aromatics will be sautéed just long enough to soften and release their aroma.
Next, deglaze the pan with wine, water, or other liquid, scrapping the bottom of the pan vigorously until the fond is completely dissolved and incorporated into the sauce. If incorporating additional herbs and spices, add them now so they have time to infuse.
Reduce deglazing liquid until almost dry, add reduced sauce base, and continue to reduce until the sauce lightly coats the back of a spoon. It is especially important to reduce the deglazing liquid when using wine, because raw alcohol can overpower a sauce, throwing off its flavor balance.
Once the desired thickness has been reached, follow the finishing steps discussed above by adding fat, acid, seasoning, and optionally straining right before serving.
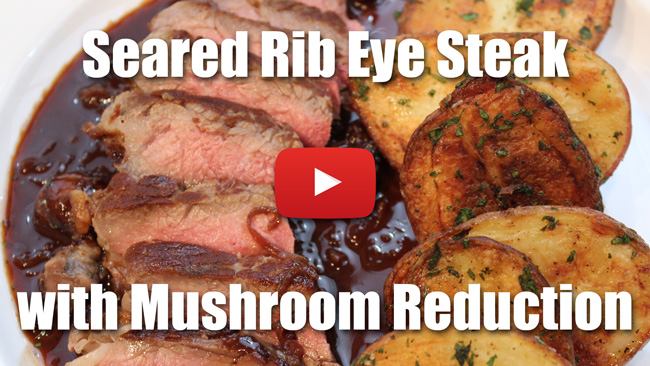
As you can imagine, this pan sauce technique is extremely versatile and is commonly used in restaurant kitchens. Here are a few pan sauce ideas, with each assuming a reinforced and reduced sauce base is on hand, and a protein has been cooked in a pan using the sauté, searing, or pan roasting techniques.
- Steak + sautéed shallots + red wine + veal stock + fresh minced thyme + lemon + butter + pepper = Thyme-Wine Demi Glace
- Duck Breast + sautéed ginger + sake + duck stock + orange zest & juice + white pepper + green onions = Ginger Orange Glace
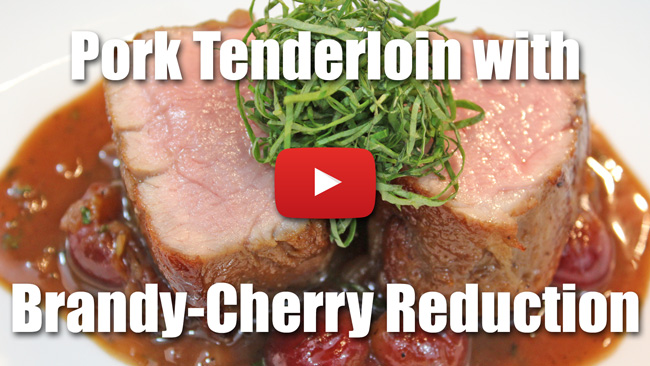
- Pork + sautéed apples & fennel + brandy + pork stock + butter + apple cider vinegar = Brandied Apple-Fennel Reduction
Note On Cookware:
For most pan sauce applications, a stainless steel pan is preferable. Non-stick pans are bad for high temperature cooking (searing and sauteing), and deglazing with acidic ingredients like wine can ruin the seasoning on a cast iron pan.
Modern Mother Sauce Number Two | Puree
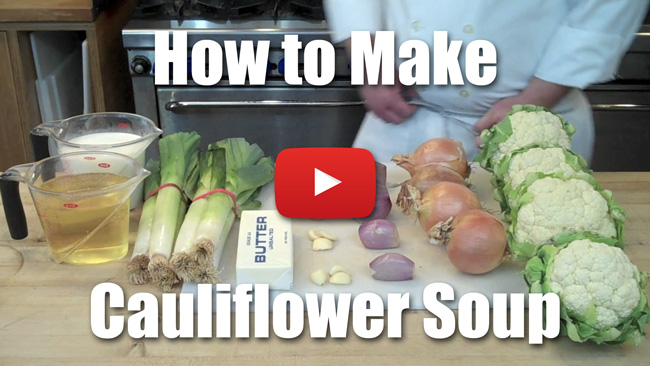 In our Cauliflower Soup video (left), a standard puree technique is demonstrated. The flavor base is built, the cauliflower is cooked in the flavor base until softened, and then everything is pureed in a blender and passed through a chinois to ensure a smooth consistency.
More puree videos are under development, and will be posted to this page once completed.
Whereas reductions are commonly thickened with gelatin or starch, purées are thickened with fine plant particles, giving a "pure taste" unique to this class of sauce.
When fat is added to a purée, it will technically become an emulsion. But for ease of classification, the line is drawn between the purpose of adding the fat. If the dispersed fat in a purée is added to thicken the sauce, then it should be classified as an emulsion. If fat is present in small amounts, just enough to add body, flavor, and mouth feel, then the sauce should be classified as a purée, and made using the associated technique.
Now the natural questions is, “if purées and emulsions are so closely related, why would you choose to use one over the other?”
As we’ve touched on briefly before, fat can mute flavors. Even though this can be balanced with proper seasoning, there are certain instances when a certain “purity of flavor” is called for, in which case, a purée is what you’ll need.
Guidelines for Making Pureed Sauces
When making a purée, it’s usually necessary to cook the ingredients, making them easier to blend into a smooth consistency. Here are some guidelines for preparing ingredients to be puréed:
Root vegetables (carrots, potatoes, parsnips, etc.), should be peeled, cut into chunks, and are either steamed, or covered with cold liquid, brought to a boil, and cooked until extremely tender. If boiling, reserve cooking liquid for pureeing, since some of the vegetable’s flavor will have diffused into the water. For a purer flavor, consider steaming the vegetables, which will cause less flavor dilution.
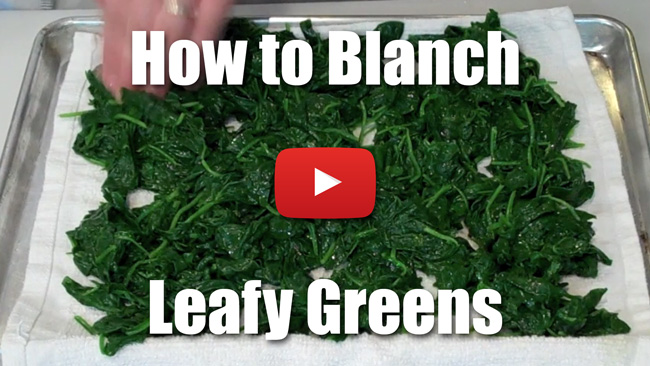
Tender vegetables and greens such as spinach, English peas, and fava beans, should be quickly blanched in a large pot of salted, boiling water, just long enough to set their green color, making them tender enough to purée. Chill in an ice bath immediately to preserve the vegetable’s green color.
Non-Green vegetables and fruits can be roasted, poached, grilled, steamed, etc., to achieve the desired flavor profile. An example could be poached pineapple, roasted garlic and eggplant, or grilled peach purée.
Remember, a purée is simply ingredients blended into a smooth consistency and used as a sauce. While the concept is extremely simple, there are a few guidelines to keep in mind.
Various kitchen tools can be used to make purées including a mortar & pestle, food processor, or an immersion/standard blender. Each of these tools will create different textures.
- Mortar & Pestle: Creates a course or chunky texture.
- Food Processor: Can create smooth purées if ingredients are soft enough and ample moisture is present.
- Immersion Blender: Convenient for hot purées that don’t need a perfectly smooth texture. The ingredients can be puréed directly in the vessel in which they are cooked. An immersion blender, however, is no substitute for the velvety consistency that can be created by a high speed, traditional blender.
- High Speed Blender: If a perfectly smooth consistency is called for, then nothing compares to a high speed blender.
When using any type of high speed blender, air will be incorporated into the purée which can effect its color. Example: tomato purée turns pink due to the air incorporated. If a chamber vacuum sealer is available, air can be removed from the purée by running the mixture through a few cycles. If a chamber vacuum isn’t available, use a less powerful mixing method to keep too much air from being incorporated. The incorporation of air is less of a concern if doesn’t effect visual appeal (e.g. pink tomato sauce looks universally unappetizing, pureed cauliflower will never suffer from too much air being incorporated).
To ensure an even, smooth texture, press the purée through a fine chinois using the bottom of a ladle, or a tamis (flat screen) using a plastic hand spatula
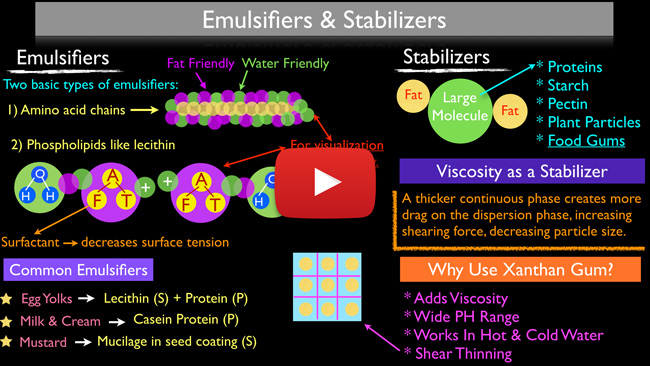
Xanthan Gum is indispensable when adjusting the consistency of a purée. For example, let’s assume a purée’s flavor is perfect but the thickness is still too thin. A touch of xanthan gum can be added to either hot or cold purées while blending, thickening the purée almost instantly.
When making purées with leafy or green vegetables, chill all ingredients to refrigeration temperature before puréeing. It’s important to blend or purée green ingredients as quickly as possible or the friction from the blender blade will heat the mixture, destabilizing the chlorophyll molecule, resulting in a dull, green color.
Pureed Sauce Examples
Now that you understand the puree making basics, let’s list a few examples to get the creative juices flowing:
Grilled Peaches with Allspice and Bourbon: Toast all spice in a dry pan and carefully deglaze with bourbon. Use this liquid to purée the grilled peaches. Season with salt, pepper, and lemon juice. Serve with chicken.
Roasted Apples with Ginger, Sage, & Cider: Roast apples in a hot oven until soft and aromatic. Blend with ginger, sage & apple cider until smooth. Pass through a chinois and serve with pork.
Roasted Garlic and Mushrooms with Red Wine: Roast garlic and add to sautéed mushrooms that have been deglazed with red wine. Blend to a thick purée and season with salt, fresh cracked black pepper, and additional red wine if necessary. Serve with beef.
Parsley Purée: Blanch parsley and reserve. Place peeled cloves of garlic in cold water and bring to a boil, drain, and repeat three times. Combine blanched parsley and garlic in a blender and blend quickly, adding cold water as necessary. A little touch of xanthan gum can be added to thicken the purée without contributing additional flavor. Serve with poached chicken or sautéed fish.
Complimentary Techniques For Purees
Some purees require a primary cooking technique to soften the flesh of the product being pureed. These techniques can include steaming, blanching, frying, steaming, and poaching.
One of the more common techniques for softening vegetables for purees is blanching, a technique we thoroughly discuss in the Stella Culinary School Podcast Episode 4| Blanching.

How Blanching Liquid's pH Effects Green Vegetable's Color and Texture
When blanching green vegetables, there is a school of thought that adds a small amount of baking soda to the blanching water to help keep the vegetables greens. This actually has a basis in science, since even a slightly acidic environment will destabilize chlorophyll molecules. Once the chlorophyll is destabilized, the vegetables will loose their bright green color, making them look less appetizing.
I've never believed in adding baking soda to my blanching water because a large pot of boiling, salted water will essentially achieve the same result. But more importantly, the alkaline environment caused by the addition of baking soda will break down the vegetable's cellular structure more rapidly, which can cause them to be mushy.
However, in the context of creating green vegetable purees, baking soda can be quite useful. Outside of leafy herbs and greens, vegetables need to be boiled (blanched) longer than normal to make them tender enough to puree into a smooth consistency. This extended boiling time can lead to their color breaking down, as anyone who has over cooked green vegetables will understand.
When cooking green vegetables for a puree, adding a small amount of baking soda to your blanching water will help stabilize the chlorophyll molecule (and thus the green color), while more rapidly breaking down the vegetable's cellular structure, which in turn allows for a smoother puree.
Modern Mother Sauce Number Three | Emulsification
Emulsion is a broad term used to describe any two immiscible liquids (meaning they don’t freely mix) successfully combined into a homogenous state. Emulsions are used to create asphalt, cosmetics, and paints, but in the kitchen, an emulsion is the successful mixing of oil and water. Combining these two elements can result in interesting sauces with unique textures and flavors. As with the previous two Modern Mother Sauces, emulsions are technique based, and once mastered, can be used to make any number of creative derivatives.
Culinary emulsions have already been covered extensively in a previous food science series called What is an Emulsion | A Cook's Guide. Please refer to that page for more detailed information on the science and technique behind emulsions.
Examples of Culinary Emulsions


Let's Keep The Conversation Going!
So look, I know this is a lot of information for you to absorb, especially if you're new to sauce making. But I never promised that mastering sauces wouldn't take time and knowledge. So work your way through content above at your own pace, and please feel free to ask any questions you have below.
Related Resources
There are 14 Comments

Hi Don, You will always
Hi Don,
You will always loose some aromatics when reducing, and some studies have shown, the slower you reduce something, the more aromatics you will maintain. This can be taken to the extreme by reducing or distilling under a vacuum, like the a rotary evaporator. With a tool like this, you can reduce red wine at 80F, which will give you a really unique, concentrated flavor. But most of the flavor comes from reducing at such a low temperature, not because the reduction takes more or less time.
I tend to do reductions over high heat because reductions take long enough as is. This is why I'll reinforce with fresh flavors at every stage of the reduction. If there's a certain aromatic compound you really want to pop, then add that right at the end of the reduction before serving.
If you want a bright wine flavor, you can slowly reduce the wine over very low heat, and then stir that wine into your sauce during the finishing steps.
Is there any flavor or application you were thinking of specifically? I may be able to give you better information if I know what you're trying to make.
Sorry for the delayed
Sorry for the delayed response. Here's an audio response that answers the questions in this thread, as well as one from YouTube. Please let me know if you have any more questions.
"The amount of clarified
"The amount of clarified butter (I used ghee, hope that's not a problem) your recipe - as well as many other recipes for Hollandaise - call for, just seems to be too much for me. Or was it just too warm?"
So are you following the recipe or adding less butter? It sounds like you're having issues with your viscosity, and the butter is what thickens the hollandaise. The more fat that's added to an emulsification, the thicker it will become.
Sounds like the
Sounds like the emulsification somehow broke. Even though the butter is warm, the hollandaise will thicken as the butter is added. Are you adding just a little bit at a time while constantly whisking?
Sounds like you're doing it
Sounds like you're doing it right. If you're still having issues after your next batch, take a picture and send it my way. It will help me better understand what's going on.
Awesome to hear Pete. Thanks
Awesome to hear Pete. Thanks for the update.